前言
在iOS 测试中依赖三个基本模块:
Unit Tests: 单元测试用于验证应用程序中各个独立单元(如函数、方法或类)的行为是否符合预期,确保每个单独的模块 (或一段代码,主要是功能) 是否能正常工作。UI Tests: UI测试则专注于验证应用程序界面的行为是否符合预期,例如确保按钮点击后触发正确的操作。性能测试用于评估应用程序在各种条件下的性能表现。Snapshot Tests: 确保应用中用户界面 (UI) 的视觉外观和一致性保持不变
iOS测试通常使用XCTest框架来编写和运行测试,该框架提供了丰富的功能和工具来支持各种测试活动。通过进行全面的iOS测试,开发人员可以提高应用程序的质量,减少错误,并确保应用程序在发布前和发布后都能够正常运行。 iOS测试在持续集成和持续部署流程中也扮演着重要的角色,有助于确保应用程序的稳定性和可靠性。
Unit Tests
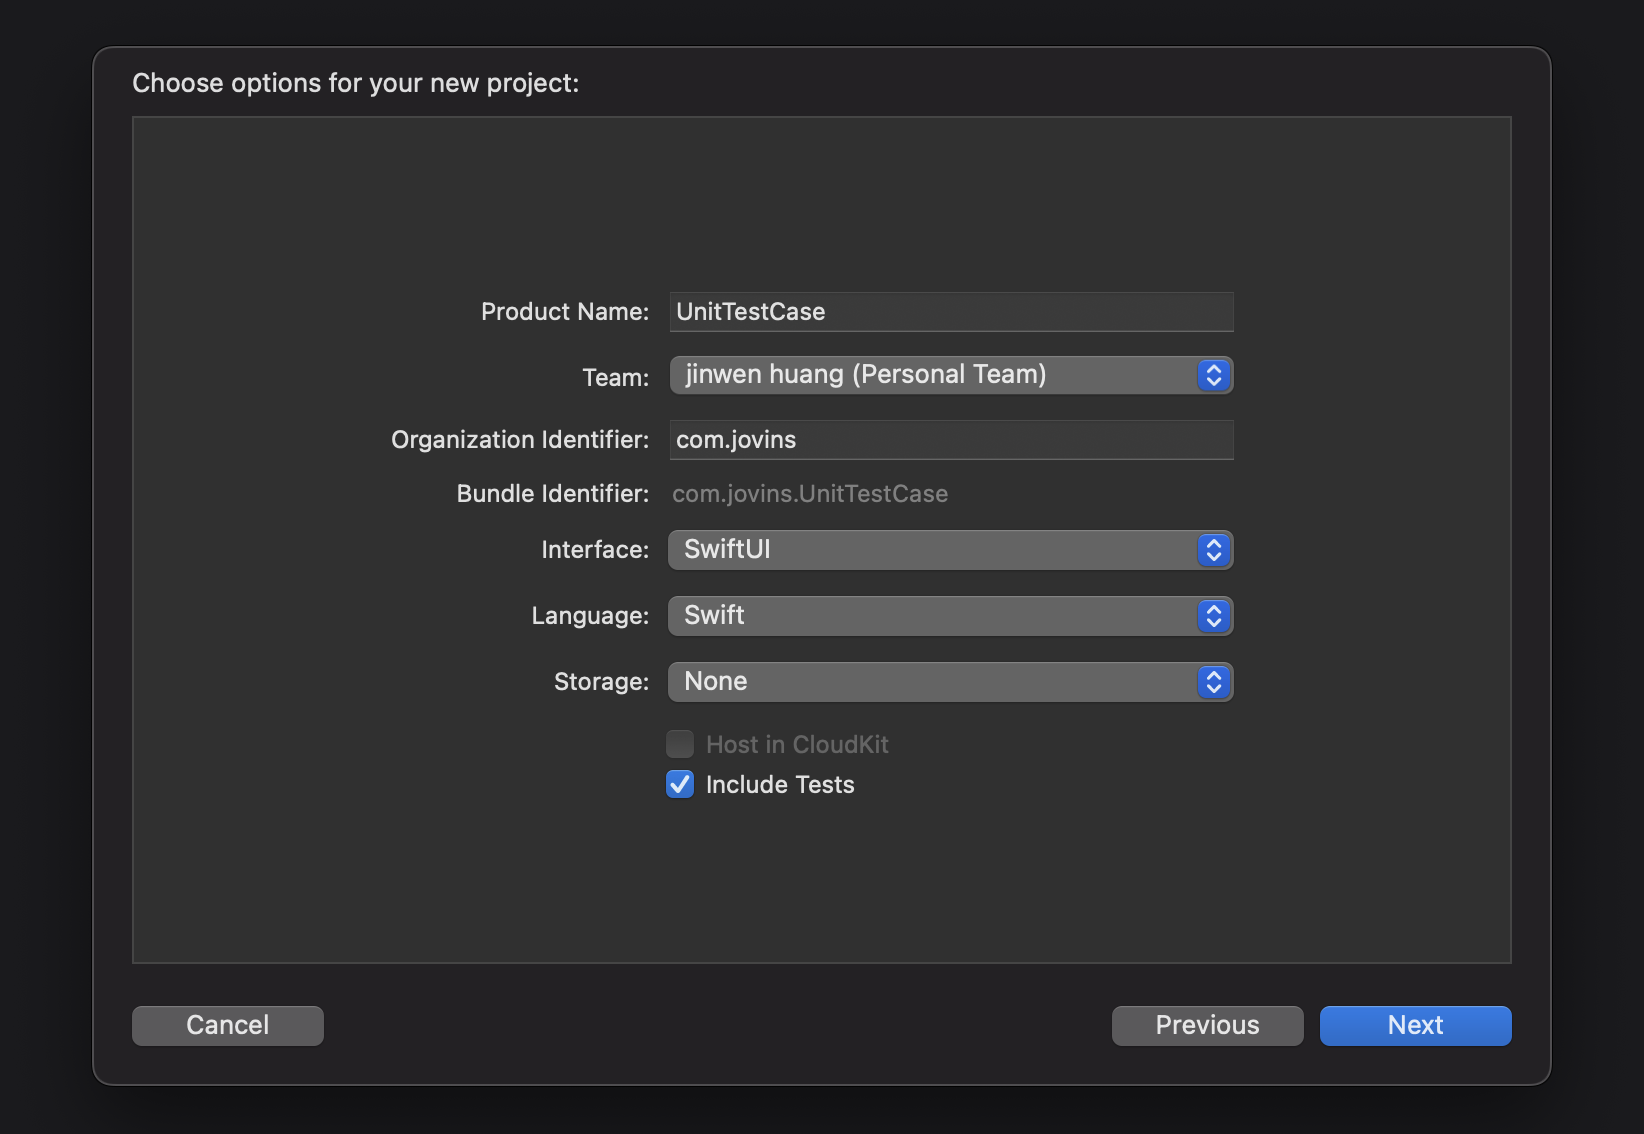
1.创建项目时,留意Choose options for your new project页面最下面那个Include Tests复选框. 选中复选框项目就会创建了一个完整的测试平台,并提供了可供使用的测试文件。
如果是旧项目没有添加Unit Test,也可以在项目中
Target那里(右下角 + 号)添加
2.仔细看看 Xcode 在“YourProjectNameTests”和“YourProjectNameUITests”目录中添加的文件,您将在其中分别为应用程序添加单元测试和 ui 测试文件。
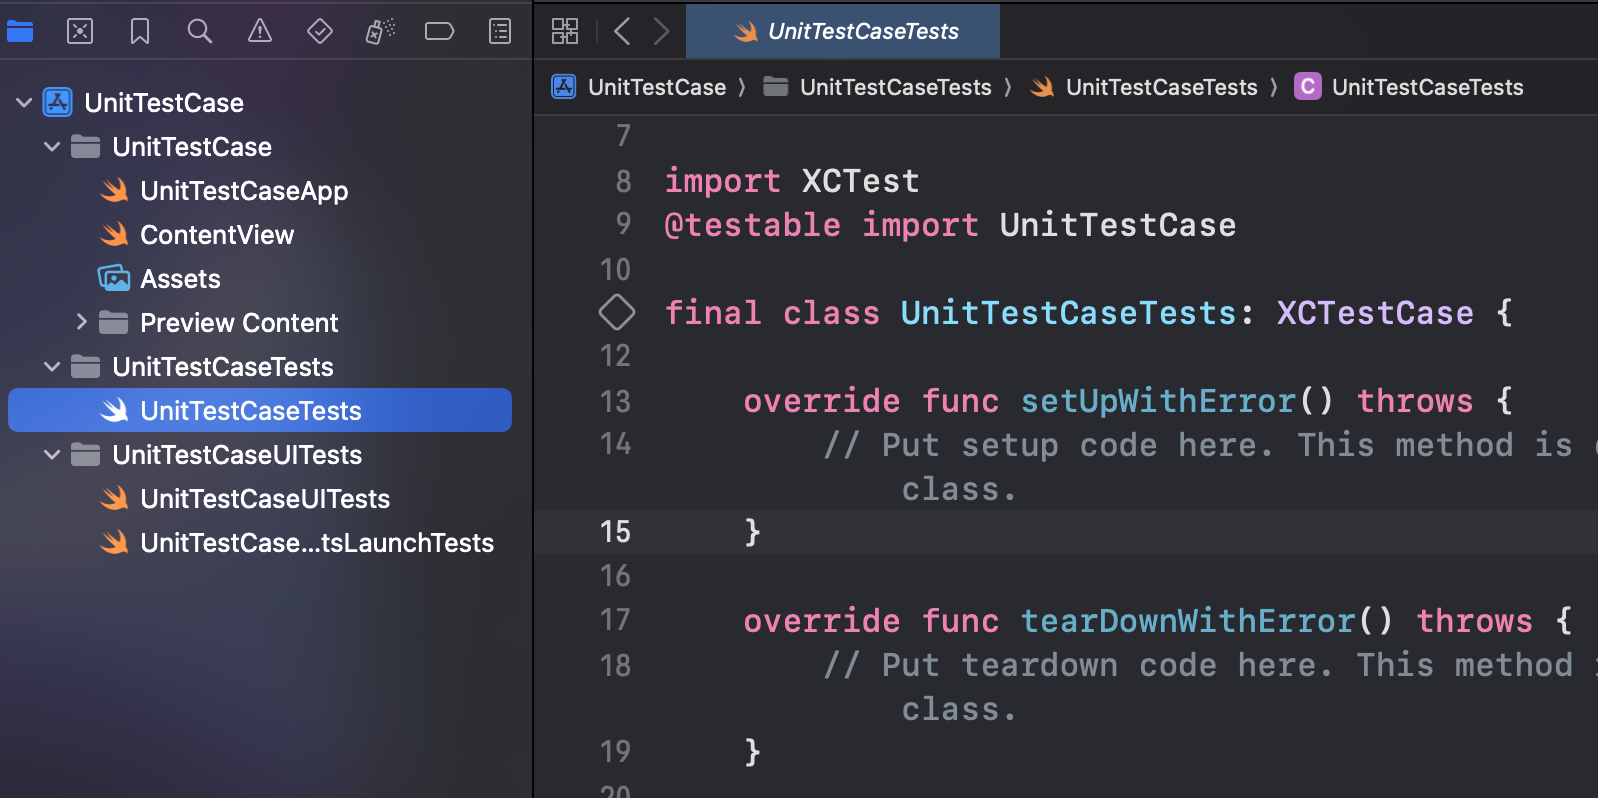
3.XCTestCase 类
1
2
3
4
5
6
7
8
9
10
11
import XCTest
@testable import UnitTestCase

final class UnitTestCaseTests: XCTestCase {
  	// 在每个单独的测试之前调用此方法
    override  func  setUp () {}
		// 在每个单独的测试之后调用此方法
    override  func  teaDown () {}
    // 测试某个功能时可以这样写
  	func testSum() {}
}
4.小试牛刀,测试某个ViewModel里面的方法是否正确
1
2
3
4
5
6
7
struct DataViewModel {
  func swapTwoValues<T>(_ a: inout T, _ b: inout T) {
     let temporaryA = a
     a = b
     b = temporaryA
	}
}
1
2
3
4
5
6
7
8
9
10
11
12
13
14
15
16
17
18
19
20
21
22
23
24
import XCTest
@testable import UnitTestCase

final class UnitTestCaseTests: XCTestCase {
    var dataViewModel: DataViewModel!

    override func setUpWithError() throws {
        try super.setUpWithError()
        dataViewModel = DataViewModel()
    }

    func testSwapValue() {
        var helloWord = "Hello World"
        var byebye = "bye bye"
        dataViewModel.swapTwoValues(&helloWord, &byebye)
        XCTAssertEqual(helloWord, "bye bye")
        XCTAssertEqual(byebye, "Hello World")
    }

    override func tearDownWithError() throws {
        try super.tearDownWithError()
        dataViewModel = nil
    }
}
测试成功
![unit test]()
测试失败
![unit test]()
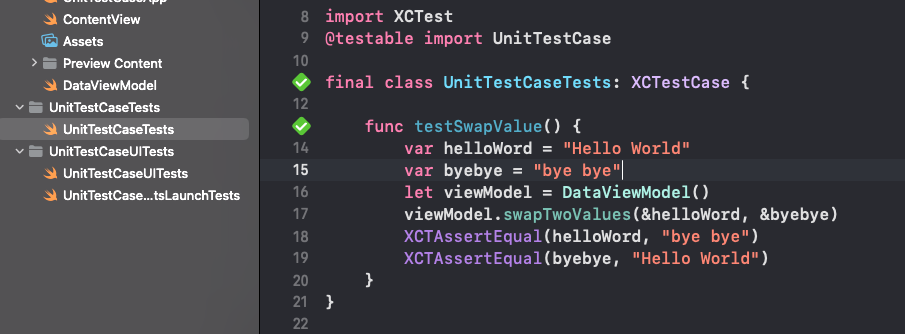

XCTAssertEqual专门用于检查两个值是否相等。这是一种验证测试中操作的实际结果是否等于预期结果的方法。 XCTest 库中有不同的断言,例如:XCTAssertTrue、XCTAssertFalse、XCTAssertNil、XCTAssertNotNil 等。
5.例如我们项目中的一些测试例子
1
2
3
4
5
6
7
8
9
10
11
12
13
14
15
16
17
18
19
20
21
22
23
24
25
26
27
28
29
30
31
/// 测试路由
import XCTest
@testable import TheBump

class AppRouterTests: TBBaseTests {
    var navigator: TBNavigator!
    override func setUpWithError() throws {
        AppRouter.shared.configureRoutes()
        navigator = AppRouter.shared.navigator
    }

    func testBWBWRegister() {
        let vc = navigator.viewController(for: "thebump://baby-week-by-week/2/test", context: nil)
        guard let vc = vc as? HBIBAndHBICViewController else {
            XCTFail("view controller is not HBIBAndHBICViewController")
            return
        }
        XCTAssertTrue(vc.isHBIC)
        XCTAssertEqual(vc.selectedWeek, 2)
        XCTAssertEqual(vc.source?["sourceType"] as? String, "test")
    }

    func testBrowserRegister() {
        let vc = navigator.viewController(for: "thebump://browser?url=www.thebump.com", context: ["title": "test"])
        guard let vc = vc as? TBBrowserViewController, let urlToLoad = vc.viewModel.urlToLoad else {
            XCTFail("view controller is not TBBrowserViewController")
            return
        }
        XCTAssertEqual(urlToLoad.absoluteString, "www.thebump.com")
    }
}
1
2
3
4
5
6
7
8
9
10
11
12
13
14
15
16
17
18
19
20
21
22
23
24
25
26
27
28
import XCTest
import RxTest
import RxSwift
@testable import TheBump

final class TBKickCounterRepositoryTests: TBBaseTests {
    private let repo = TBKickCounterRepository.shared

    override func setUp() {
        super.setUp()
        repo.resetAllKickCounters()
    }
    func testAddKickCounter() {
        let kickCounterModel = TBKickCounterModel(startTime: Date())
        let expectation = expectation(description: "AddKickCounter")
        let disposeBag = DisposeBag()
        repo.kickCounterSubject.subscribe { models in
            if let model = models.first?.first {
                XCTAssertEqual(model, kickCounterModel)
                XCTAssertEqual(model.endTime, nil)
            }
            expectation.fulfill()
        } onError: { _ in
        }.disposed(by: disposeBag)
        repo.startNewCount(model: kickCounterModel)
        waitForExpectations(timeout: 2, handler: nil)
    }
}
UI Tests
为什么要使用UI 测试呢?
UI Tests是用户界面测试的缩写,就像App图形用户界面 (GUI) 的检查员。旨在检查应用程序界面的行为方式,并确保其在用户与其交互时按预期运行。 UI 测试模拟真实的用户交互,并帮助您发现应用程序视觉元素和用户体验中的任何问题或故障。
探索UI Test
在上面创建的UnitTestCase项目中,有个名为UnitTestCaseUITests目录中有个UI 测试,这个目录存储并管理了所有UI 测试示例。比如初始化UI测试用例是测试App启动时间:
1
2
3
4
5
6
7
8
9
10
11
12
13
14
15
16
17
18
19
20
21
final class UnitTestCaseUITests: XCTestCase {

    override func setUpWithError() throws {
        continueAfterFailure = false
    }

    override func tearDownWithError() throws {}

    func testExample() throws {
        let app = XCUIApplication()
        app.launch()
    }

    func testLaunchPerformance() throws {
        if #available(macOS 10.15, iOS 13.0, tvOS 13.0, watchOS 7.0, *) {
            measure(metrics: [XCTApplicationLaunchMetric()]) {
                XCUIApplication().launch()
            }
        }
    }
}
- UI 测试中的和函数的工作方式与单元测试中的相同,在每个测试之前和之后运行,以做好准备工作并在之后进行清理。在
setUpWithError中设置continueAfterFailure,设置为false表示出现问题,不要继续;设置为true表示出现问题,继续执行完成所有测试。 - 创建一个
func testExample() throws函数,里面初始化启动应用程序XCUIApplication(),app代表要测试的应用程序,**app.launch()**启动的应用程序。 measure(metrics: [XCTApplicationLaunchMetric()]) { ... }:这部分设置测试,告诉Xcode正在测试App启动所需要的时间是多少…
UI 测试例子
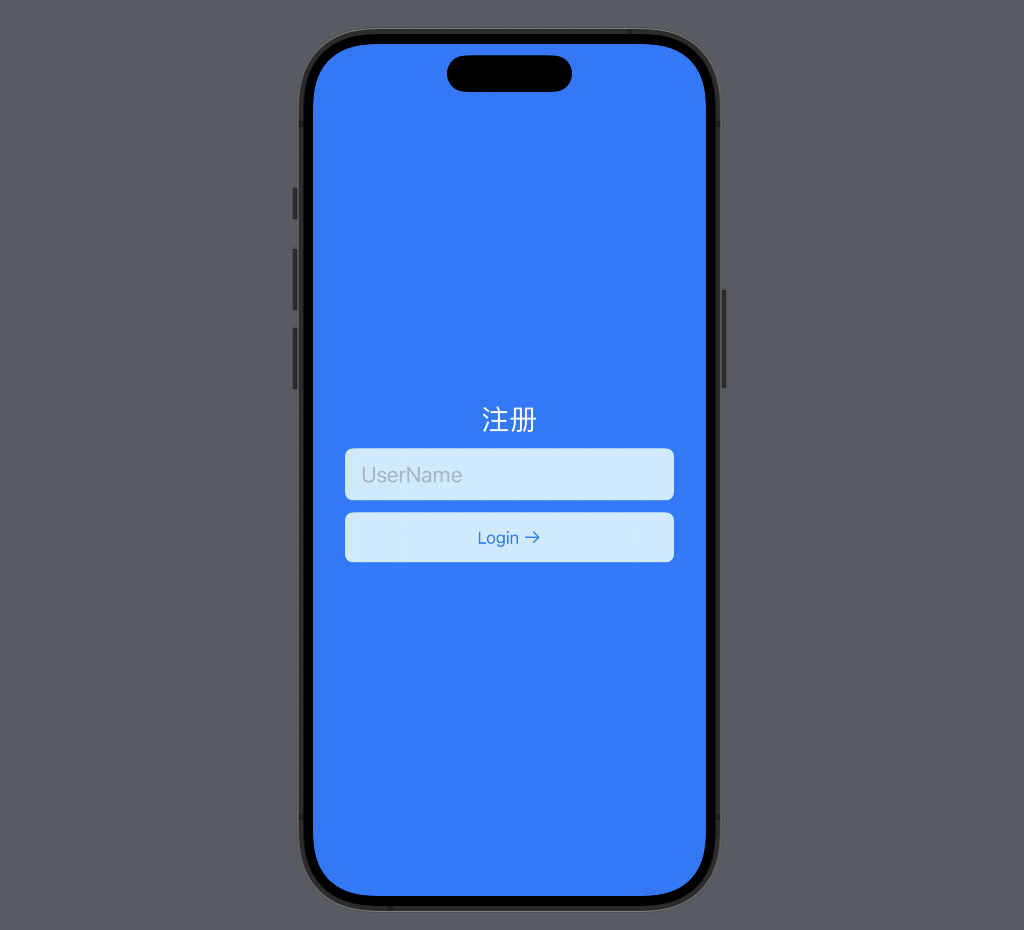
如下图:
1
2
3
4
需要测试的内容有:
1.确保`注册`文本存在
2.检查文本字段是否有效并打开键盘
3.检查`Login`按钮、当用户名为空时该按钮是否可以点击
1.测试”注册”文本存在
1
2
3
4
5
6
func test_textRegistration_isPresent() {
    let app =  XCUIApplication ()
    app.launch()
    let registrationStaticText = app.staticTexts["注册"]
    XCTAssertEqual(registrationStaticText.exists, true)
}
2.检查文本字段是否有效并打开键盘
1
2
3
4
5
6
func test_usernameTextField() {
    let app =  XCUIApplication ()
    app.launch()
    let textField = app.textFields["用户名"]
    XCTAssertEqual(textField.exists, true)
}
1
2
3
4
5
6
7
8
func test_didCallKeyboard() {
    let app =  XCUIApplication ()
    app.launch()
    let textField = app.textFields["用户名"]
    XCTAssertFalse(app.keyboards.element.exists, "键盘初始不可见")
    textField.tap()
    XCTAssertTrue(app.keyboards.element.exists, "键盘正常打开")
}
3.检查Login按钮
1
2
3
4
5
6
7
8
9
10
11
12
13
14
15
16
17
// Textfield 为空时,button不可点击
let app =  XCUIApplication ()
app.launch()
app.buttons["Login"].tap()
let helloWorldStaticText = app.staticTexts["Hello world"]
XCTAssertFalse(helloWorldStaticText.exists, "Hello world exist")

/// Textfield 不为空时,button可点击
let app =  XCUIApplication ()
app.launch()
let textField = app.textFields["用户名"]
textField.tap()
let AKey = app.keys["A"]
AKey.tap()
app.buttons["Login"].tap()
let helloWorldStaticText = app.staticTexts["Hello world"]
XCTAssertTrue(helloWorldStaticText.exists, "Hello world exist")
UI Tests是 iOS 应用开发的一个重要方面,它使我们能够确保应用的用户界面按预期运行。通过在 Xcode 中创建 UI 测试并遵循“给定 - 何时 - 然后”模式,我们可以彻底检查应用用户体验的不同方面。
Snapshot Tests
Snapshot Tests是软件开发(包括 iOS 应用开发)中使用的一种自动化测试。它侧重于确保应用中用户界面 (UI) 的视觉外观和一致性保持不变。工作原理如下:
- 创建快照测试时,对应用中的特定 UI 组件或屏幕进行初始“快照”。
- 运行快照测试时,会将 UI 组件的当前状态与存储的快照进行比较。如果它们完全匹配,则测试通过。但如果有任何差异,则测试失败。
- 如果测试因有意更改 UI 而失败,可以选择更新存储的快照以匹配新的 UI 外观。此过程是受控且经过深思熟虑的,可确保您在测试过程中审核并批准所有更改。
测试步骤如下:
1
2
3
1.集成Snapshot工具
2.获取主屏幕快照
3.重新生成新快照跟保存的对比
1.集成Snapshot工具
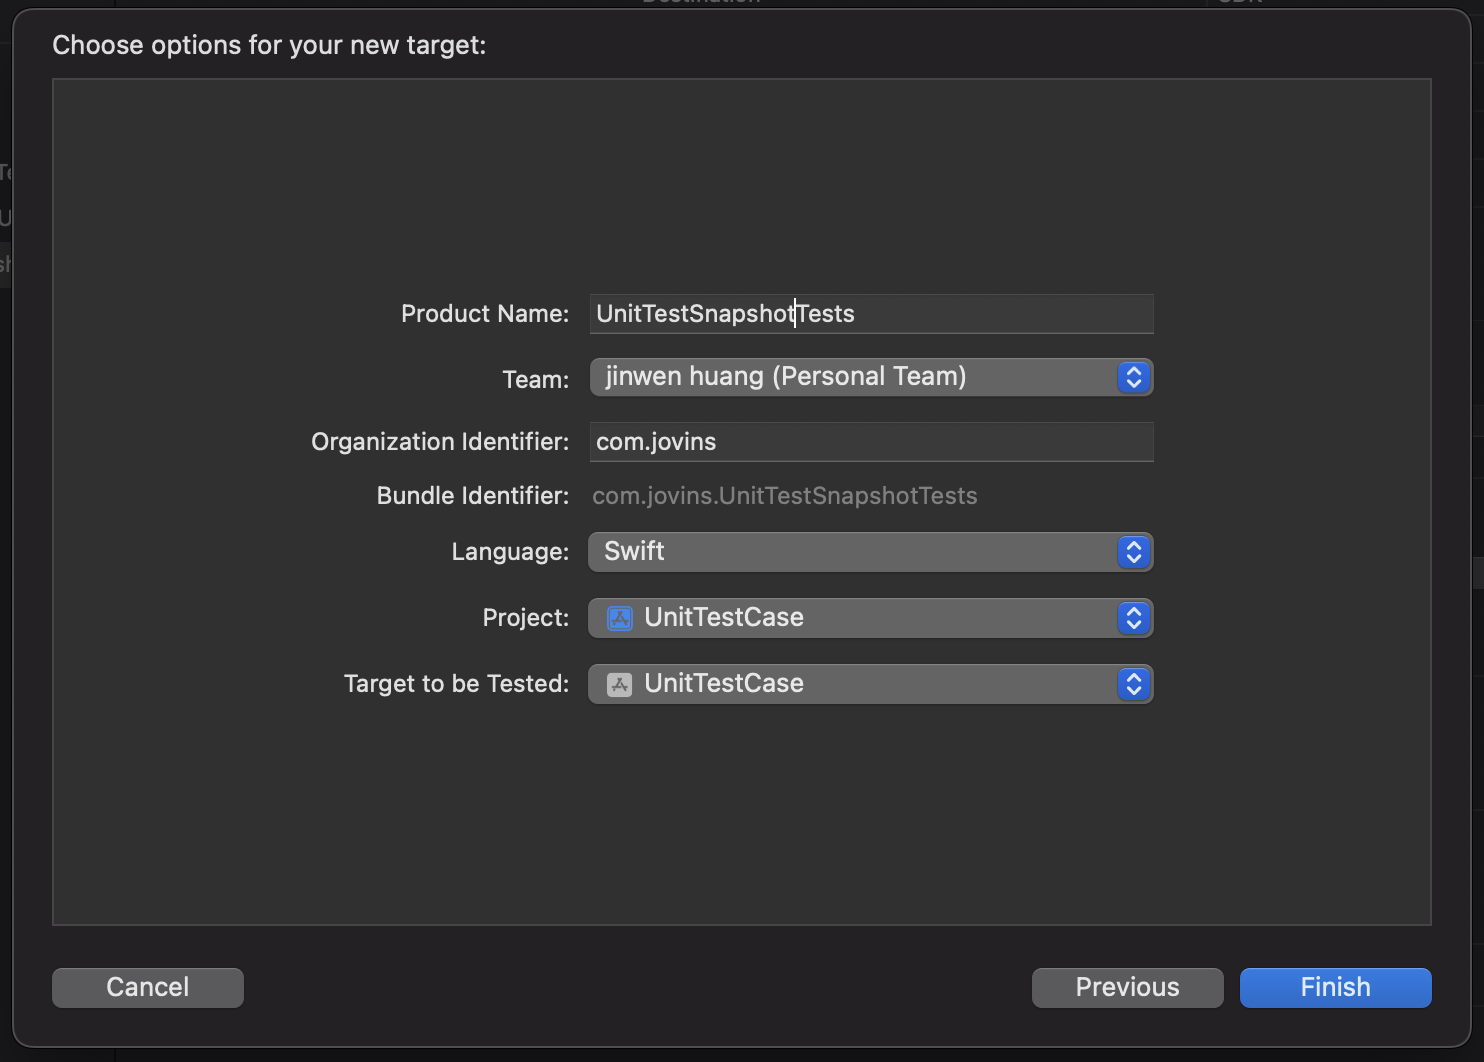
为快照测试创建一个新目标。虽然可以使用 UI 测试目标,但是为了区分不同测试,可以选中Target项目,在右下角选 +按钮,选择Unit Testing Bundle来执行此操作。

将其命名为“YourProjectSnapshotTests”。如果您不确定如何添加新目标,可以参考此处获取指导。
2.获取主屏幕快照
第一次运行测试时会失败,但是它会创建一个快照,保存到如下目录.../UnitTestCase/UnitTestSnapshotTests/__Snapshots__/UnitTestSnapshotTests/test_snapshot_Test.1.png;然后第二次运行时会将之前保存的快照和当前的比较,测试成功。
1
2
3
4
5
6
7
8
9
import XCTest
import SnapshotTesting
@testable import UnitTestCase
final class UnitTestSnapshotTests: XCTestCase {
    func test_snapshot_Test() {
        let view = ContentView()
        assertSnapshot(of: view, as: .image)
    }
}
3.快照刷新过程
已经了解了如何创建快照,如果改变一下视图。将背景颜色蓝色切换为红色,然后再次运行测试。你期望结果是什么?当然,它会失败。所以,让我们在测试用例中添加额外的行:
1
assertSnapshot(of: view, as: .image, record: true)
Snapshot Tests就像是 iOS 应用外观的可靠守护者。它可确保您的应用始终以同样引人注目的设计令人眼花缭乱,避免出现意外的视觉问题。通过遵循组织良好的流程,您可以大胆地处理 UI 更新,简化测试程序,并提供不仅无故障而且视觉效果令人愉悦的 iOS 应用。